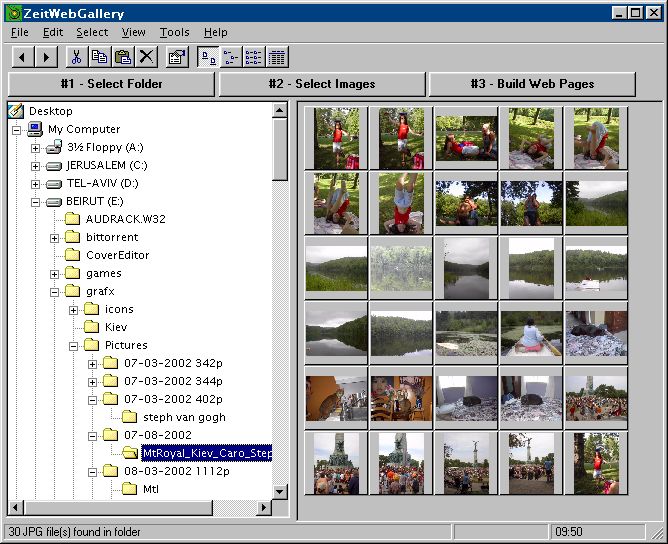
- On the left pane, navigate and select the folder holding the pictures or images.
- Wait for the left pane to finish displaying the images from the folder.
- Right-click with the mouse the images you'd like to include in the gallery or double-click an image to bring up the Edit Picture window (image editor/selector window).
- Once all the images you'd like in your Web Gallery have been selected, select the Tools/Build Web Pages menu or click the #3 - Build Web Pages button to bring up the Build Web Pages window.
- When you are satisfied with the settings of the Build Web Pages window, click the Do It! button to create the Web Gallery.
- Open your Web Gallery with your favorite browser. The file index.html (default) in the image folder contains the image's thumbnails and the file photos.html (default) will show one full size image at the time with a simple navigation system.
|
 |
top
|
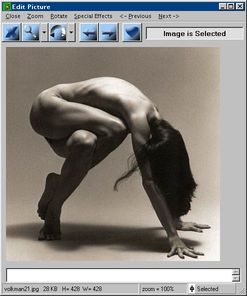
Button's functions from left to right:
- Close this window: The button with the big X on it.
- Zoom: Select Zoom In, Zoom Out or 100% (actual image size).
- Rotate: Select Rotate Left, Rotate Right or 180°.
- Previous Image: Show previous image in folder.
- Next Image: Show next image in folder.
- Select/Unselect Image: Select or unselect the image to be part of the Web Gallery. The button with the heart on it.
- Special Effects menu: In the menu, click Special Effects to bring up the F/X toolbox where you can adjust the brightness, gamma and add a few visual effects to the image.
|
 |
top
|
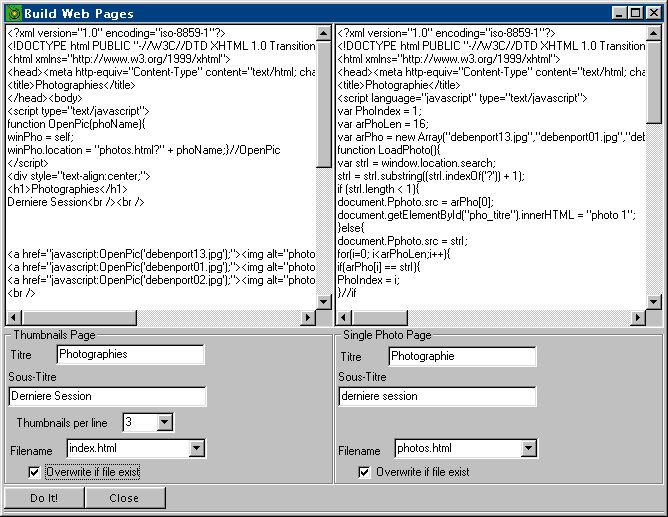
- The Build Web Pages window is divided in 2 panes (left and right).
- The left pane represents the file with thumbnails (default is index.html)
- The right pane represents the file (default is photos.html) showing one image at the time with a few navigation links (previous, next, up).
- The top textboxes will show the raw HTML code authored by the program after the Do It! button has been clicked.
- The Titre fields are the page's titles. They will also show up as a header (h1 HTML tag) in the web page itself.
- The Sous-Titre fields will show up under the title header in the web page itself.
- The Thumbnails per line determine how many thumbnails will be aligned before a new line (br HTML tag) is inserted.
- The Filename fields are the web page's filenames.
- The Overwrite if file exist checkboxes will overwrite the html files if checked.
- The Do It! button authors the web pages and create the Web Gallery. The newly created files (the html files and the thumbnails images) reside in the image folder as selected in the Main Window.
- The Close button closes the Build Web Pages window.
|
 |

 Web Gallery